Showing posts with label cake. Show all posts

Monday, February 14, 2011

Cup Cake - To Enjoy with Your Valentine

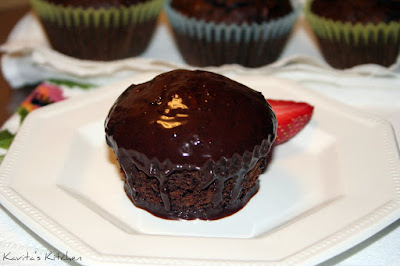
I was going through recipes to find a perfect cup-cake for Valentine Day. When I skimmed through the ingredients for this Chocolate bourbon Cup cake,I knew my search had ended.

This cup cake has Irish whiskey along with coffee and roasted coconut & roasted almonds & some baking chocolate. I was not interested in the regular fair,I was looking for some complexity and this cup cake recipe sounded very promising. My first bite and I was completely thrown back by how wonderfully all these ingredients had worked. The cup cake keeps unfolding with every bite you eat.The first bite is so addicting with notes of Irish whiskey,infused with notes of instant coffee & dark chocolate.The roasted coconut and almonds give it the desired crunch and you don't want this love-affair to stop .  Enjoy this with your valentine-Serve three on a plate you both eat one each and  share the third one, after all loving is sharing :)


Ingredients:
All purpose flour: 1 cup
baking Soda: 1/2 tsp
Instant Coffee: 1/2 cup
Bourbon or any other whiskey: 2 tbsp ( I used Irish whiskey )
Unsweetened chocolate: 2 1/2 ounces chopped fine
Unsalted Butter: 1 stick
Vanilla: 1/2 tsp
Egg: 1large beaten lightly
Sugar: 1 cup
Sweetened Coconut flakes toasted and cooled: 3/4 cup
Almonds: 1/2 cup chopped,toasted & cooled

Method:
1.Sift together flour,baking soda and a pinch of salt in a bowl.
2.In another bowl set over barely simmering water,combine the coffee,butter,chocolate & whiskey and heat the mixture until the butter & chocolate has melted and the mix looks glossy and evenly mixed.
3. Remove the bowl from the pan and whisk in the flour mixture,the vanilla,the lightly beaten egg,sugar,coconut and the almonds.
4. Divide the batter among 12 1/2 cup paper lined 10  muffin tins and bake  in a preheated 350 d f oven till a tooth pick inserted in the centre comes out clean.

 drizzle some chocolate sauce and enjoy these yummy cup cakes :)


Saturday, February 5, 2011

World Nutella Day & Cupcakes with Nutella & Nusco topping


It is funny-I have never started  writing a post until I have tasted what I am sharing with the rest of the world. The nutella cup cakes are still in the oven and there are a good 15 minutes before they come out for the final testament. They looked good when they went inside and I am positive they will come out  swell :)

Today happens to be the World Nutella Day ,so I knew I had to celebrate this for my daughter lest she call me insipid ...no ..actually I knew I had to do something special as her birthday also happens to be 2 days from now,I could serve these to her friends along with some of her other favorites (only if I still have some  of these left ,till then)

I have to share this with everyone that I was completely unaware of this decadent,rich & creamy bread spreads existence for a very long time.
I was in Hyderabad, when one of our  friend's sister  who was married  to a German guy and lived in Germany , was visiting India and  she got  bottles of Nutella for her family. Her niece was Manasi's friend and this is how Manasi first got introduced to Nutella. Manasi was very excited and asked me to look for this wonder spread in the stores. I checked with some of my friends who had already been living in Hyderabad much before we moved there and they led me to this fancy store which carried many exotic products  from other countries. The bottle was very expensive and I used to use the spread very frugally on the bread :0

OK the cup cakes are done and they look as light as a feather,the frosting is not the traditional frosting  nevertheless the nutella self frosting  cup cakes look and taste marvellous. The nutella hardens up in the oven and the texture is that of any  traditional  frosting. I did swirl it up a little with a metal toothpick  before I put them in the oven and I must say these taste incredibly soft and buttery with all the nutella goodness the Nutella day calls for.

Thanks to Amy  of Playing House who finds her own unique ways of baking and cooking,I am in love with this simplified self frosting nutella cupcakes. BTW Amy I  too have very little Patience with icing bags and frosting, they do fall under the high maintenance category for me .So I instantly grabbed this one .The moment I layed my eyes on this,I knew this was my kinda recipe.

Manasi has gone to Manhattan to celebrate her  pre-birthday party with her friends,she is in for a surprise when she gets back tonite,I will have these on a tray in her room by her bedside table :)

Here is the recipe for these cup cakes:
Notes: I have mixed Nusco which is also a duo hazelnut spread a product of Holland with Nutella.

Ingredients:
All purpose flour: 1 and 3/4 cup
Butter: 10 tbsp (140 gms)
white sugar: 3/4 cup
eggs: 3
Baking Powder: 2 tsp
vanilla: 1/2 tsp
salt: 1/2 tsp
Nutella: 1/3 cup approximately

Line 12 muffin tins with paper liners. This mix will make 12 cupcakes.
Pre-heat the oven at 325 d farenheit

Method:
Beat the butter and sugar till light and creamy. Add eggs one at a time and beat well till well incorporated. Take the flour with baking powder & salt and seive.
Now add the flour a little at a time and fold in with the creamed butter & sugar.When all the flour is well incorporated add the vanilla. Mix it well, and scoop out a tbsp and a half  of the batter and fill the muffin tins upto 3/4  level and top it with a tsp of nutella and make a swirl pattern with a fork or a toothpick and let some of it mix with the batter.

Bake these for roughly 20 minutes or till a toothpick inserted in the centre comes out clean.


Friday, December 31, 2010

Marble Cake & Good Bye 2010 :)!!!

2010 just flew by :) It was peaceful and happy and  kept us close with our loved ones. We are just 15 hours away from welcoming 2011 and I look forward to all the things it has in store for me & my family.

I hope and pray for all of us to be safe,healthy & happy in the year 2011 and beyond :) !!!

The post I am writing today on Chocolate Marbled Cake is Manasi's & my niece Guddu's favorite and  everyone else's who has eaten it and swears by it :) It has a rich buttery taste with cocoa goodness and rises very well and has a nice crumbly & light as a feather rise to it,it just melts in your mouth and leaves you with such a rich after taste,there is nothing better than a cuppa tea/coffee to go with this. It stays well in the fridge(if there is any left) and when ready to serve just stick it in the oven for 20 seconds it will taste fresh baked from the oven.
Ingredients:
Butter: 175 g (6 oz)
Caster Sugar: 175 g (6 oz)
Eggs: 2
Self Rising Flour: 175 g (6oz)
Milk to mix
Cocoa Powder: 25 g (1 oz)

Method:
Grease & line a 8 inch round cake tin. Cream the butter and sugar together until pale and fluffy. Add the egg a little at a time,beating well after each addition. Gradually sift in the flour over the mixture and fold in lightly with a metal spoon,adding a little milk to give a soft dropping consistency. Take half of this batter in a separate bowl and sift in cocoa and fold it lightly.

Put large spoonfuls of plain and chocolate mixture alternately in the prepared tin. Lightly swirl the mixture with a knife to give it a marbled effect and level the surface. Bake in the oven at 350 degree f till the cake is done and a cake tester inserted in the centre comes out clean ( it roughly take 40 minutes )


Notes: I have doubled the quantity here and used a rectangle cake tin .
This recipe is from Good Housekeeping Complete book Of Cakes And Pastries

Friday, December 24, 2010

Buche de Noel or Yule Log & A Very Merry Christmas To All :)!!!


I had promised Manasi,that I would make a Yule log this Christmas and bring in some Christmas cheer into our home. Manasi was very excited as she along with her friend  Lauren had made Buche De Noel 2 years back for a french project and claimed it was  the coolest  thing !!! Also when you do something with  a close friend you  create special everlasting memories, it is sweet because I realized we invariably ended up talking about her and Lauren,and the good times they had when they were together in the same school :)

I had fun making the chocolate Swiss roll and rolling it up ,which was a little tricky (just the first roll) after that it came very naturally and  the chocolate frosting was the best part , me and Manasi kept licking the  frosting that came on our hands :0 Manasi helped me get the bark effect by running the fork through the frosting in crooked lines. The effect looked stunning and the log tasted oooh so yummy,we could not get enough of it. I hope I can convince you enough to make it this season, (I plan to do this for New Year's also) you can involve the little ones in this preparation,frosting the Swiss roll is fun, and there is no one way or wrong way of frosting,this is a log and has a rustic appeal .So they can have a go at it :) Sprinkling the powdered sugar is even more fun and gives it  the snowy effect which is even cooler :)!!!

Baking A  Chocolate Swiss Roll:
Ingredients: Makes one 8 inch roll
Eggs: 3
Sugar: 3 oz caster or super fine
Self Raising Flour: 2 oz
Cocoa Powder: 1 oz unsweetened

For Filling:
Heavy cream( double)  120 ml
Sugar: 1 tsp

Chocolate Frosting:
Unsweetened baking Chocolate: 3 oz
Butter Unsalted: 2 tbsp
Milk: 1 cup
Powdered Sugar: 3 cups
vanilla: few drops

Method For Baking A Swiss roll:
Take the three eggs in a big bowl( they will double in size) and add sugar and beat with an electric beater for about 10 minutes till the eggs becomes pale and thick and the mixture trails off the whisk in ribbons.

Now fold in the flour & cocoa very gently and make sure you do not over fold .
Grease a 8 by 12 inch Swiss roll pan or cut a parchment paper and line the pan with this and brush the paper with butter/oil. Now pour the batter onto this and very gently spread this evenly.

Pre-heat the oven to 400 degree f and bake this for 10- 12 minutes  or until well risen and firm to the touch.


Take a tea towel and spread a parchment paper and dust it with icing sugar and invert the Swiss roll on this.
Now take a knife and very gently lift it up from the edge and then take the edge get your hands on the roll along with the parchment paper and tea towel and make a roll and keep rolling it gently,don't worry about the cracks ,there will be frosting to cover that.

Now press the roll gently for a couple minutes and unroll it on the parchment paper and whip the double heavy cream with sugar until stiff . Spread this evenly on the sponge after it is cool enough to hold the cream. Spread the whipped cream evenly and roll the sponge along with the parchment paper and leave it in the fridge for 30 minutes.Meanwhile you can get the chocolate frosting ready.


Method for Chocolate Frosting:
Take a heavy bottomed pan and add the 2 tbsp butter and when melted add the unsweetened baking chocolate and cook on very low flame stirring constantly till it becomes smooth.Now turn off the flame and add 3 cups sugar and 1 cup milk and beat with an electric mixer till it blends well. This should already be thick and easily spreadable consistency but if not then stick it in the fridge for some more time till it has  achieved the desired spreadable consistency.

Now get the Swiss roll out from the fride and put it on a flat plate or the baking tin and remove the parchment paper and tea towel. Cut the ends at a slanting angle and use them to stick either on the sides or on the top. This is entirely up to your creativity :)

Now comes the best part of frosting the Swiss roll.  Take spoonful of frosting and spread it on the log in a thick layer and then with a fork make angled or crooked lines to give it the bark effect.


You can finish this by sprinkling some powdered sugar to give it a snowy effect, and you can also make some holly leaves and do whatever you fancy and go wild with creativity :)

Notes: Roll the Swiss roll immediately once it comes out of the oven and is still moist. Leaving it to coll before rolling is not a option you have as there is no moisture and the sponge develops cracks.

P.S Everyone have a wonderful holiday season and wish you all the very best from 2011,I will be taking a week long break from blogging and will see you in 2011 :) So long....
Stay warm and be safe with your loved ones,God Bless !!!

Wednesday, December 1, 2010

Crunchy Topped Cocoa cake

I was flipping through the Hershey's Classic recipes, I found the Crunchy-Topped Cocoa cake picture very tempting and I had never worked with the ingredients this recipe called for until now . This recipe is not very lengthy and  actually super simple to put together. It took me 10 minutes to pull out the stuff from the pantry and mix these in a bowl ,pour it in the pan and stick the pan in the oven. The topping took another 5 minutes-The result-Exceptionally good !!! The cake is not very rich as it has no eggs and butter but the topping more than makes up for that,and together this is a must bake cake :)


Preparation Time: 20 minutes
Bake Time: 35 minutes
Makes 9 servings

Ingredients:
1 1/2 cups all-purpose flour
1 cup sugar
1/4 cup cocoa
1 tsp baking soda
1/2 tsp salt
1 cup water
1/4 cup plus 2 tbsp vegetable oil
1 tbsp white vinegar
1 tsp vanilla extract

broiled topping:
1/4 cup  butter ( 1/2 stick butter) softened
1/2 cup packed light brown sugar
1/2 cup coarsely chopped nuts
1/2 cup mounds sweetened coconut flakes
3 tbsp light cream or evaporated milk

method for preparing the topping:
Stir together all ingredients in a small bowl until well blended. It makes about 1 cup topping.


Method Fir Cake:
1.heat oven to 350 degree f. Grease and flour 8 inch square baking pan.

2. Stir together flour,sugar,cocoa,baking soda and salt in a large bowl. Add water,oil,vinegar and vanilla; beat with a spoon or whisk just until smooth and ingredients are well blended.Pour batter into prepared pan.

3. bake 35 to 40 minutes or until wooden pick inserted in centre comes out clean.meanwhile,prepare broiled topping; spread on warm cake. Set oven to broil; place pan about 4 inches from heat.broil 3 minutes or until top is bubbly and golden brown.remove from oven.cool completely in pan or wire rack.

Tuesday, November 23, 2010

Milk chocolate- Walnut Coffee Cake

Early morning starts with a cuppa tea & multi tasking : watching news, reading mails & going through new posts by blogger friends and writing comments on their posts . I start feasting my eyes on these amazing dishes and baked breads & fantastic cakes. Mary has baked an amazing coconut bread. I was tempted to give it a try but realized I did not have a couple ingredients. OK I said to myself,"I will wait for this one". The rest of the day went by doing routine  stuff - regular chores including morning walk, lunch,  running errands and so on and so forth .  it is late  in the evening and I read the updated post on http://food&thriftfinds/ on my dashboard. I had to visit happygo Marni  blog when I read about her on Elizabeth's blog & visit  I did  & I see this milk chocolate-walnut coffee cake beauty on Marnie's blog. I noticed I had everything the cake called for in my pantry. I was thrilled- I had been itching to bake something  since early morning :) This sounded fun ,I liked the layering of sugar with Cinnamon & walnuts with milk chocolate chips. This cake turned out exactly what I had hoped for & more . Almost half of it was eaten as dessert after dinner & hopefully we will have some left for our evening tea tomorrow :) This  is a very simple cake to bake. Thank you !!! Elizabeth for leading me to happy go marni's blog . It is one amazing place for baking good stuff.


Ingredients:
1 stick butter or 8 tbsp unsalted & room temperature
1/2 cup granulated sugar & 3 tbsp
1/3 cup firmly packed light brown sugar
2 large eggs
1 tsp vanilla extract
2 cups all-purpose unbleached flour
1 1/2 tsp baking powder
1/2 tsp baking soda
1/4 tsp salt
3/4 cup butter milk or low-fat  plain yogurt ( I have used Greek fat free yogurt )
2 tsp ground cinnamon
6 ounces milk chocolate or milk chocolate wafers ( I have used milk & peanut chocolate chips)
1 cup(4 ounces) of walnuts or  pecans roasted

Method:
Pre-heat the oven to 350 degree F. Lightly butter and flour a 9 inch spring form pan .
In a large bowl cream butter & sugar ( reserve the 3 tbsp granulated sugar) together with a wooden spoon or an electric mixer and beat in the eggs & vanilla until smooth. In a medium bowl sieve flour,baking powder,salt and baking soda. Now stir the  dry ingredients into the creamed mixture alternately with the buttermilk/yogurt in two increments until the batter is smooth.

Stir together the cinnamon and sugar. Now pour half of the batter in the prepared pan. Sprinkle half of the granulated sugar with cinnamon and top it with the chopped walnuts & chocolate chips. Now pour the rest half of the batter and sprinkle the remaining half of the granulated sugar mixed with cinnamon and then layer it with roasted walnuts and chocolate chips.

Bake for 25 to 30 minutes or until a toothpick poked in the centre comes out clean.


This is the batter that goes in the oven

The cake is ready

Bake & make a toast to the holiday breakfast :) This will be loved by one & all !!!

Monday, November 8, 2010

Caramel- Glazed Apple Cake

No Kiddin' my home smelt like a  french bakery  today while this Apple Cake was rising & being cooked in the oven at 325 degree f . The  sweet smell of apples along with cinnamon & nutmeg was intoxicating and I had developed a ravenous appetite & could not wait to indulge  all my buds in this sweet scrummy apple delight . I am writing this post on a deeply satisfying note, it sure was a slice from heaven :) I added the caramel glaze and topped it with some home made fresh cream and ate it along with a slice of apple. No I don't mean to tantalize your taste buds.Go hurry make yourself some of this.......


Cake:
1 cup packed light brown sugar
1 cup granulated sugar
1 1/2 cups vegetable oil
3 eggs
3 cups all purpose flour
1 tsp baking soda
2 tsp cinnamon
1/2 tsp nutmeg
1/2 tsp salt
5 Washington granny smith apples or golden delicious apples(cored peeled & cut in 1/2 inch pieces)
1 1/4 cups chopped pecans or walnuts
2 1/4 tsp vanilla extract


Glaze:
4 tbsp butter
1/4 cup granulated sugar
1/4 cup light brown sugar
Pinch of salt
1/2 cup heavy cream

Method:
Preheat oven to 325 degrees f.Butter & flour a9-by-13-inch pan
To prepare the cake,beat both sugars and oil in a mixing bowl until very well blended.Add eggs one at a time,beating well after each addition. Sift together flour,baking soda,cinnamon,nutmeg & salt ;
gradually add to eggs mixing just blended. Stir in apples,pecans & vanilla; pour into pan.

Bake for 50-75 minutes,or until a toothpick inserted in the centre comes out clean.Let cool in the pan while preparing the glaze.

Method for Glaze:
Melt butter in a sauce pan over low heat .Stir in both sugars and salt and; Cook over medium low heat for 2 minutes. Add cream and boil for 2 minutes .Stirring constantly.

Poke holes in the cake with a skewer or toothpick.Pour on the glaze. Serve warm or at room temperature.Top with fresh whipped cream or ice cream.

Makes 12 servings.

Note: I halved the ingredients for the cake and the glaze as well. So the cake you see in the picture is made with 1 1/2 cup all purpose flour and similarly all other ingredients are also exactly half of what this recipe calls for.

The cake was ready in 30 minutes. So even if the recipe says 50-70 minutes,I will not wait that long to check on my cake.I have made this cake with the exact proportions as mentioned in the recipe & cake was done in 45 minutes. I baked it on mark 3


I followed this recipe from,"Easy Cooking The Costco Way ".